
Cat flaps offer the convenience of letting your pet leave and come as it pleases without you needing to open the door or window for them. They are available in a variety of materials and can be incorporated into windows, doors and walls.
A professional tradesman can install a cat flap into any type of door, including wood, composite and uPVC.
Installation Costs
The cost of installing a cat flap could differ significantly based on the dimensions, the type and complexity of the project. The wall or door material can also impact the labor cost. For example, installation into a glass French door will probably cost more than installation into the wooden door.
It is recommended that you employ a certified tradesperson to complete the work. This will ensure that the work is done correctly and your pet is protected. A professional may cost more, but you will save time and money. A professional can also inform you on the kind of cat flap would be best for your home.
There are a myriad of cat flaps available on the market. They range from basic manual flaps up to the latest microchip-enabled models. It is essential to select the right cat flap for your pet as well as your home. This will determine how easily and comfortably your pet can use the flap. It is also crucial to measure your pet, so that the cat flap fits your pet comfortably.
Once the cat flap is put in place, it is vital to give your pet a few days to get used to it. This will help them to feel comfortable and secure within the house which is essential for their mental well-being. The door must be shut and opened frequently so that your pet is familiar with the new sensations.
You should also make sure that the flap is a comfortable height for your pet. If it's too low your cat may struggle to use it and might end up getting hurt in the process. Ideally, the top of the flap should be at a minimum 1 inch higher than your cat's back.
A common concern is whether to put a cat flap in a glass door. While this is a nice option, it could be unfavorable if you plan to sell your home in the future. This is because potential buyers won't be attracted to homes with holes in its cavity wall.
Additional Costs
It is crucial to be aware of any additional costs involved in the installation when purchasing a new cat-flap for your home. This could include both the cost of the cat flap as also the labor and materials required to install it. The kind of pet flap you select will also impact the cost of your project. More expensive models cost more than less expensive and simpler ones.
There are a myriad of different kinds of dog and cat flaps available. Each one has its own unique features. Microchip-operated flaps for instance, are designed to recognize your pet's chip and prevent any other cats from gaining access to your home. These cat and pet flaps may be more expensive than conventional pet flaps, but they provide greater security and peace of mind.
It is crucial to consider the dimensions of your pet or cat and the material your wall or door is made of when selecting the cat or dog flap. Some surfaces are more pliable to cut than others, and this could impact the overall cost of the project.
A skilled tradesperson can solve the difficulties of installing a cat flap in various kinds of walls and doors. This will save you time and money, while also ensuring that the work is done correctly.
Many homeowners try to install a cat's flap themselves. This can be dangerous and challenging. cat flap step who has been vetted will ensure that the pet flap is installed properly and safely, preventing injury or damage to your pet.
If you're looking for a local pro to install your cat flap, MyBuilder is the perfect place to find them. Simply post a job listing your specifications and wait for the quotes to come in. You can then evaluate prices and reviews, and then hire the most qualified professional for your project.
Materials
A cat flap is a doorway in a door, window or wall that permits the cat to enter and go as they want. These cat flaps are available in a variety of sizes, styles and materials that can be adapted to any space or budget. There are a range of security options available, such as microchip, magnetic and electronic. Each of these options offers distinct benefits and features, however each will require different installation methods.
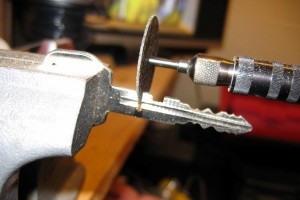
Take a measurement of the belly height of the cat prior to installing the flap. This is the height of the cat's stomach from the floor to the bottom. This will help you decide where to install the cat flap in the door. Double-check your height measurements to make sure you're getting a precise measurement. Utilizing a spirit level, ensure that the line is perfectly straight. The template that comes with the kit can be used to mark the hole on the door.
If you're using a magnetic or microchip cat flap, ensure that you have programmed your cat's collar tag or microchip prior to the time the flap is installed. This will ensure that only your cat is allowed to enter and prevents neighbouring cats from gaining access to your home. Fix the bolts that hold the fixing in place and then apply any sealant recommended by the manufacturer of the flap.
After the fixing bolts have been installed, slide the inside section into place. Then align it with the line you traced earlier. Push each fixing bolt through the hole in the outer portion of the flap and screw the nuts in. Once the screws are in place Use a spirit gauge to make sure that everything is flush. Then sand off the edges of the flap.
Based on the amount of insulation in your home, you may wish to add loft insulation around the cat flap tunnel. This will keep out cold drafts and help lower your energy bills. Make sure you show your cat how to use the flap and allow them time to adjust to it. It may take some time for certain cats to adjust to the freedom to go and come at their own pace However, they'll soon be enjoying their newfound freedom.
Time
Making precise measurements and using the correct tools prior to starting the project will ensure that the cat flap is correctly installed. The instructions that come with the chosen cat flap will explain which sections should will be installed where, and whether there are any additional tools needed. The wall or door material will determine how easy or difficult the installation procedure is, with certain materials requiring more tools than others.
After the wall or door has been prepared and the installation process is ready to begin. The installation process can take anywhere from one to three hours depending on the complexity and specifications of the cat flap. In this stage, the chosen cat flap is fixed into the wall or door and any final adjustments are made. This may include making sure that the microchip is calibrated on the flap (if you've selected one that is microchip-enabled) or checking that the flap shuts and opens properly for your cat.
When the flap is put in place, it's important to let your cat become comfortable with it. It may take some time, or maybe weeks, to be comfortable entering and leaving at their own pace. You can use treats or other positive reinforcements in the meantime to encourage them to use the flap. You can also shut it when the weather is bad or you don't wish to see them leave.
Once your cat is comfortable with the new flap, it's an excellent idea to keep an eye on them and make sure they don't get stuck outside or try to climb inside the house! If they do, you can lock the flap using a bolt or hook.
Consider hiring a professional to install a cat flap on your behalf. They'll not only help you save time and effort, but they can also guarantee the job is done correctly and safely.